
Cleaning Your Water Quality Field Instruments
Environmental instruments used in the field are constantly exposed to challenging conditions. Algae buildup, sediment deposits, and debris are common issues that can cling to sensors and other components, making cleaning a critical part of fieldwork. Regular maintenance not only ensures accurate data collection but also extends the life of your equipment.
To maintain optimal performance and prevent cross-contamination between sampling sites, it's essential to clean your instruments thoroughly after every deployment or sampling event. Stubborn residues can interfere with calibration and may even damage sensitive sensor components if left unchecked.
For best results, make it a habit to clean your equipment before calibration, measurement collection, and storage. This ensures your sensors are functioning at their highest accuracy and reduces the risk of introducing errors into your data.
In the meantime, follow these practical cleaning techniques to protect your instruments and keep them running at peak performance for years to come.
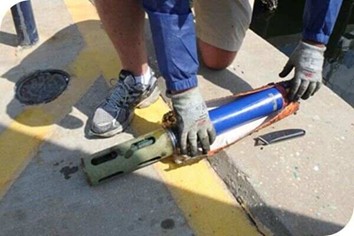
Sonde body, handhelds, and cables
- Rinse the equipment thoroughly with clean, fresh water to remove loose debris.
- Use a mild detergent, such as Simple Green or a small amount of dish soap, to gently scrub away dirt and grime.
- For stubborn fouling, soak components in white vinegar or a 1:1 solution of bleach and water for 15 minutes to up to 3 hours, depending on the severity.
- Ensure that port plugs or sensors remain installed during vinegar or bleach soaks to protect internal components from damage.
- To reduce biofouling and make cleaning easier, consider using anti-fouling accessories such as copper tape, copper sensor guards, heat-shrink sleeves, or C-spray. These tools can help prevent buildup or make tough fouling easier to remove.
Note: Important: Avoid using harsh chemicals, such as ammonia-based laboratory cleaners, on water quality instruments and sensors, as they can damage sensitive components and compromise data accuracy.
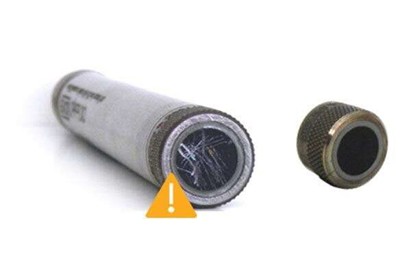
Military-spec (mil-spec) and LEMO connectors (e.g. Pro Series, ProDSS)
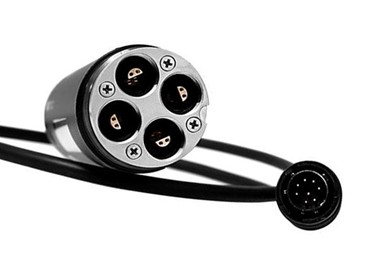
To remove visible dirt and debris:
- Flush sensor ports with isopropyl alcohol to help dislodge contaminants.
- Gently dry the area using a small puff of compressed air.
Important Reminders:
- Avoid frequent removal of sensors, as repeated removal can cause wear or damage to the ports. Only remove sensors when necessary for cleaning or replacement.
- Keep ports dry—do not expose them to water.
- Do not apply grease directly inside the ports. Apply a small amount of grease only to the O-rings to maintain a proper seal.

Wet-mate connectors (e.g. EXO Sonde and accessories)
Wet-mate connectors are designed to resist water damage and corrosion. Their neoprene rubber coating forms a protective seal that prevents water intrusion, allowing for reliable connections even in wet conditions.
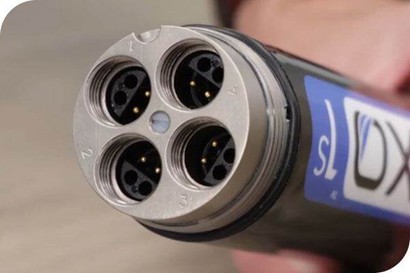
Caring for Wet-Mate Connectors
To ensure optimal performance and longevity of wet-mate connectors, follow these maintenance steps every 3–6 months:
- Remove all sensors from the instrument.
- Use a lint-free cloth to gently clean the internal threads, removing any old grease or debris.
- Flush the ports with deionised (DI) water—do not use alcohol, as it can degrade the materials.
- Dry the area with a lint-free cloth.
- Apply a small, pea-sized amount of silicone grease to your finger and gently coat the black neoprene rubber on the connector. Rub until the surface appears shiny.
Note: A small amount of moisture left in the port will not cause damage. However, it is essential to regrease wet-mate connectors after cleaning to maintain a watertight seal and prevent corrosion.
O-rings
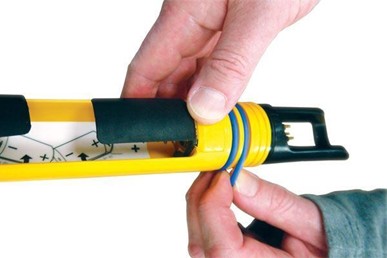
roper care of the O-rings in the EXO1 battery compartment is essential to maintain a watertight seal and protect internal components. Follow these steps for cleaning and maintenance:
- Removing the O-Rings:
Carefully use your fingers to pinch and lift the O-rings from the compartment.
Important: Never use tools such as screwdrivers, as they can scratch the mating surfaces and compromise the seal.
- Cleaning the O-Rings and Mating Surface:
- Remove the O-rings and clean the surrounding surfaces and threads with a soft brush to eliminate grease, dirt, and debris.
- Inspect the O-rings for signs of damage or wear.
- Lubricating the O-Rings
- Clean off any old grease from both new and existing O-rings.
- Apply a small amount of silicone grease to your finger and gently rub it along all sides of the O-ring. This allows you to feel for imperfections, such as nicks or tears.
- Inspecting and Replacing O-Rings:
- Ensure the O-ring surface feels smooth and free of damage or debris.
- Replace any O-rings that show signs of wear, and always lubricate new O-rings before installation.
Proper O-ring maintenance helps ensure a secure seal and reliable performance during field use.
A small dab of grease is all you need!
pH and pH/ORP
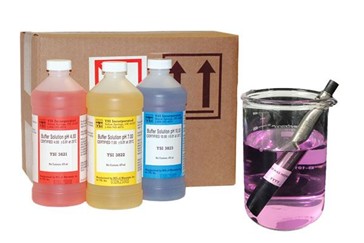
3 Effective Methods for Optimal Performance
Proper sensor cleaning is crucial for maintaining accurate measurements and extending the life of your equipment. Here are three proven options to clean your sensor effectively:
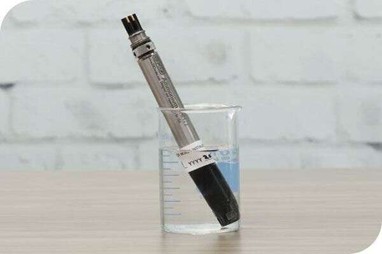
- Soapy Water Cleaning
- Soak the sensor tip in a mild soapy water solution for 15 minutes to loosen dirt and debris.
- Rinse thoroughly with clean water.
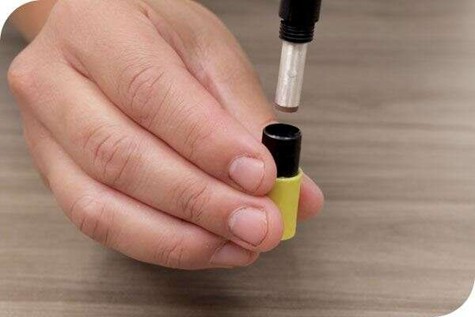
- Acid or Vinegar Soak for Foggy Bulbs
- For sensors with a foggy bulb, soak the tip in 1M hydrochloric acid (HCl) or white vinegar for 30 minutes.
- Rinse well with water after soaking.
- Follow by soaking the sensor in tap water for 1 hour to help flush out residual chemicals.
- Bleach Soak for Tough Fouling or Reference Junction Cleaning
- For stubborn fouling or fouling inside the reference junction, soak the sensor tip in a 1:1 bleach and water solution for 15 minutes.
- Rinse thoroughly.
- Soak again in tap water for 1 hour to remove any remaining bleach.
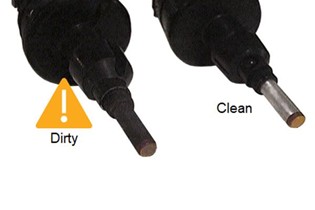
Important Cleaning Tips for Sensor Maintenance
- Always soak the sensor tip in tap water after chemical soaks. This step draws out residual chemicals like HCl, vinegar, or bleach from the reference junction, protecting your sensor’s internal components.
- Avoid using deionized (DI) water for the final soak. DI water can deplete your pH reference solution and negatively impact sensor performance.
- If you use both hydrochloric acid and bleach soaks, rinse thoroughly between treatments. This prevents dangerous chemical reactions.
- Persistent issues after cleaning? If your sensor measurements or calibration do not improve, it may be time to replace the pH module.
By following these sensor cleaning best practices, you can ensure reliable data and prolong the life of your environmental instruments.
Ammonium, Chloride, and Nitrate Ion Selective Electrodes (ISEs)
How to Clean Your Sensor for Accurate Measurements
- Gently rinse the sensor tip with a light spray of deionized (DI) water to remove loose debris.
- Soak the sensor tip for several hours or overnight in a standard solution that matches your expected measurement range (for example, 1 mg/L or 100 mg/L). This helps condition the sensor for precise readings.
- For Chloride ISE only: Wipe the membrane with a lint-free cloth, then gently buff the surface using 400-grit or finer emery paper to remove deposits.
Polarographic and Galvanic Dissolved Oxygen (DO)
To clean the sensor:
- Detach the DO sensor from the bulkhead.
- Remove the old or used membrane.
- Rinse the electrode thoroughly with deionized (DI) water.
- For unstable readings, gently remove tarnish by buffing the anode and cathode with 400-grit sandpaper—limit buffing to twice per year.
- Dry the sensor using a lint-free cloth.
- Install a clean, dry membrane to protect the electrode.
Optical DO (ODO)
Sensor Cleaning Instructions (ODO Sensor):
- Gently wipe the sensor face with a lint-free cloth.
- Use a soft brush with mild soap and water to clean the surface.
- For stubborn fouling, soak the sensor tip in a 1:1 vinegar and water solution for 30 minutes.
- Do not use abrasives, alcohol, or harsh chemicals, as they can damage the sensor.
Important: Always keep the ODO cap moist. If it becomes dry or dehydrated, soak the sensor tip overnight in tap water. Replace the ODO cap every 1–2 years, or as needed based on calibration performance and data stability.
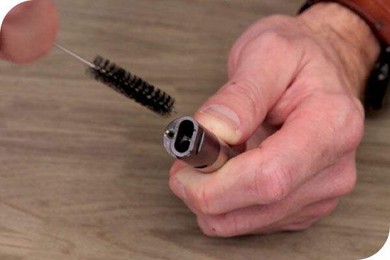
Conductivity/Temperature (C/T)
How to Clean the Conductivity/Temperature Sensor:
- Swish the sensor tip in a solution of mild soap and water to loosen debris.
- Soak in white vinegar to help dissolve stubborn fouling.
- Do not soak in bleach—this can tarnish or damage the electrodes.
- Use a soft brush to gently clean the electrodes:
- For standard nickel electrode channels, use a small pipe brush.
- EXO Wiped Conductivity/Temperature sensors with graphite electrodes, use a soft toothbrush.
Note: A properly cleaned conductivity sensor should read 0 µS/cm in air, with a tolerance of ±3 µS/cm.

Optical Sensors: Turbidity, Total Algae (Chlorophyll and Phycocyanin/Phycoerythrin), fDOM, NitraLED, Rhodamine
Sensor Cleaning Instructions:
- Gently wipe the sensor faces with a lint-free cloth.
Note: Take care not to scratch the sensor windows, as this can impact data accuracy.
ProDSS and EXO optical sensors are equipped with durable sapphire windows that are highly resistant to scratching.
Integrated Depth/Pressure Transducer
Depth Sensor Cleaning Instructions:
- Visually inspect the integrated depth port for signs of debris or fouling.
- Use a syringe filled with clean water to flush the port until the water runs clear.
- For heavy fouling, soak the sonde in white vinegar, then flush thoroughly with clean water using a syringe.
Note: Never insert any objects into the depth port holes—doing so can damage the internal pressure transducer.
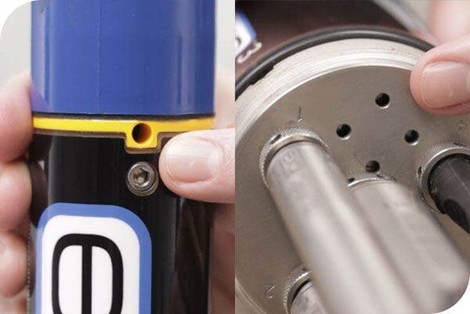
Right: Depth port locations on the EXO2 and EXO3 models.
Keep Your Sensors Clean for Reliable Performance
Routine cleaning and proper maintenance of environmental sensors are essential to ensure accurate measurements, protect against damage, and extend the life of your equipment. Whether you’re working with pH, DO, conductivity, or optical sensors, following manufacturer-recommended cleaning procedures helps prevent buildup, fouling, and calibration issues, especially after field deployments in challenging environments.
Always use the appropriate cleaning tools, solutions, and techniques specific to each sensor type, and handle sensitive components with care. Regular inspections, proper storage, and timely replacement of worn parts like O-rings and membranes can make a significant difference in the quality and reliability of your data.
For more detailed care instructions, storage guidance, and best practices, feel free to contact us, and we’ll be happy to help.
|
To find out more: |